

How To Install Wordpress On Wamp Server In Windows 10
Having WordPress fix up as a localhost on my computer has get invaluable to workflows, particularly when regularly testing themes and plugins. This article shows you how to ready WordPress locally for PC/Windows by using WampServer.
My local sites run much faster, plus testing products on my local machine is much safer than testing on a live site – not to mention much cheaper without the price of web hosting.
Setting upwards a local server surround for WordPress isn't difficult and will save you fourth dimension in the long run since you won't have to install and uninstall a fresh copy of WordPress online each time you examination or develop something for WordPress.
There are many options for Windows. I've previously looked at how to set up a localhost using XAMPP. In this tutorial, I'll walk you through how to fix WampServer, including installation, creating a MySQL database, and installing WordPress. I've included optional steps for setting upwards Multisite.
Continue reading, or jump ahead using these links:
- What is WampServer?
- Installing WampServer
- Check WampServer is Running
- Setting Up Your MySQL Database
- Download and Install WordPress
- Setting upward WordPress Multisite
What is WampServer?
WampServer is a pop Windows web development environment that allows yous to create web applications with Apache2, PHP, and a MySQL database.
WordPress isn't a stand-alone application and needs server software to run. WampServer provides the necessary server environment so you can install and run WordPress on your local motorcar rather than on the internet.
Installing WampServer
Head over to the WampServer site and download the latest version of the software. WampServer is an open-source project and is complimentary to apply.

The WampServer site offers ii versions of the software – 32 Bits or 64 $.25. Click on the version you prefer.
A warning message will display. Click on "download directly," and y'all'll be taken to the SourceForge website. The download will automatically first in 5 seconds.
The WampServer executable file is small at simply 41.5MB, compared to XAMPP, which is 125MB.
Yous may receive warnings near installing the software on your reckoner. As you lot would when installing whatsoever software on Windows, use your all-time judgment, though it's best to ignore the warnings if yous want the installation to keep.
The WampServer setup wizard will guide you through the installation.

The adjacent window will ask you to agree with the software'southward terms and weather condition. Check "I have the agreement" and click "Adjacent."

Side by side, select where yous would like to install the software and click "Side by side." The default is c:\wamp, which I'm going to use for this tutorial.

In the side by side window, you can cull to create shortcuts so you lot can speedily and easily access WampServer on your computer. I'g non going to create whatsoever for this tutorial.
The software is now fix to install, and so go ahead and click "Install."

In one case installed, you may be prompted to choose your default browser. In my example, I chose Google Chrome.
You'll then be prompted over again to specify the SMTP server and the email address to be used by PHP. These settings aren't all that important, and so but leave the defaults and click "Next."

Installation is now consummate! Click "Finish" and the software will launch.

Check WampServer is Running
If you click "Finish" and the software doesn't launch and you come across any errors, it might exist that you don't have the Microsoft Visual C++ libraries installed on your computer. Apache and PHP won't run without them.
For Windows 64BIT: Install the Visual C++ 2022 SP1 Redistributable Package x64 : VC10 SP1 vcredist_x64.exe
Depending on your local car, y'all may have to install one or both of these files. If WampServer still doesn't work, try installing Visual C++ Redistributable for Visual Studio 2022 Update 4.
If y'all keep to have any bug, cheque out the WampServer forums.
If any security warnings pop up, such as firewall warnings, be sure to let access otherwise the software won't work.
If you click "Finish" and the software does launch, a WampServer icon will announced in the systems tray.

The color of the WampServer icon allows yous to apace make up one's mind the status of your servers.
- If the icon is red, the server isn't running and is offline. You may need to restart WampServer or check out the WampServer forums for more assist.
- If it is orange, the server is partially running, i.e. Apache may exist running and the MySQL service is offline. Click on the WampServer icon and check the service status next to Apache and MySQL to see if they are running. You may need to restart WampServer, and if it however doesn't work, check out the WampServer forums.
- If the icon is green, it means the server is running and you should be able to access localhost from your browser.
To test it, become to "localhost" in your browser.

Setting Up Your MySQL Database
Before we install WordPress, we need a database.
Click on the WampServer icon in your arrangement tray and so click on phpMyAdmin.

A new browser window will automatically open with the phpMyAdmin interface.

Click on "Databases" near the acme-left and you'll be prompted to create a new database. I've chosen mine "WP".
When you lot've entered a name, click "Create" and shut the window.

Download and Install WordPress
Download the latest version of WordPress.
In order to get WordPress working with WampServer y'all need to unzip WordPress to the right folder. Extract WordPress to theC:/wamp/www/ folder.
You lot can rename the WordPress folder whatever you like. I'chiliad going to keep it every bit "wordpress."

Next, open your WordPress folder, find the wp-config-sample.php file and rename information technology wp-config.php . Open the file and scroll downward until you encounter the following lines:

These lines of code define the login details for your database. Supersede"database_name_here" with the name of your database, which in my case is "WP."
Supplant "username_here" with"root"and exit"password_here"blank.
Relieve the file and close information technology.
Now we tin go on with installing WordPress.
Open your browser and become tohttp://localhost/wordpress/
You lot should see the welcome screen for the famous 5-infinitesimal WordPress installation process.

Enter your details and click "Install WordPress."
Your WordPress installation is now complete!
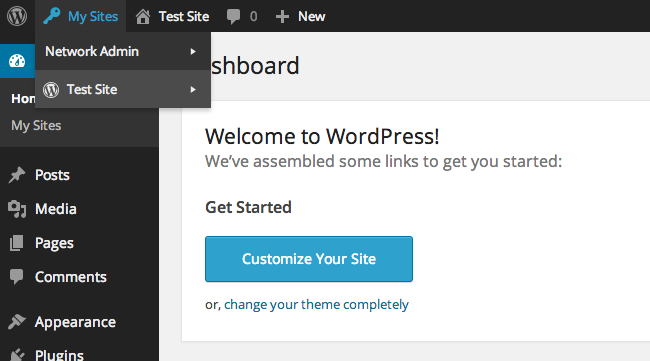
Setting up WordPress Multisite
Setting up Multisite on localhost provides a quick and easy way to test/develop themes and plugins away from a live site.
Open up yourwp-config.php file again and add/edit the following lines to activate Multisite's installation mode:

Click on the WampServer icon in your organisation tray and ensure your Apache and MySQL servers are running.
Login to your localhost site in your browser and under "Tools" you will now accept a new option, "Network Setup."

Enter a name for your network and your email address, then click "Install."
WordPress will prompt you to edit yourwp-config.php and.htaccess files.
Following the onscreen instructions, openwp-config.php and add the following lines underneath your previous edit:

Adjacent, open.htaccess. If yous can't find it, make sure hidden files are displayed on your computer.
Your.htaccess file should look similar this:

Edit your .htaccess file to consummate your Multisite installation.
Multisite should now be enabled and working on your WordPress site!
Summing Upward
WampServer offers a relatively easy way to run a local server environment on your Windows machine, allowing you lot to examination and develop locally rather than online.
Running WordPress locally will salvage you a lot of time since you won't have to install and uninstall a fresh copy of WordPress each time you test themes and plugins with your web host.
While WampServer is gratis and open source software, it's easy to meet problem setting information technology upwards on Windows. While putting this tutorial together I ran into a agglomeration of issues trying to get Apache working. XAMPP is relatively easier to set upwards and I would recommend that every bit a more reliable alternative.
Overall, setting up a server surround is relatively painless and something I would recommend to any WordPress developer or hacker.

Source: https://wpmudev.com/blog/how-to-set-up-wordpress-locally-for-pcwindows-with-wamp/
Posted by: schumacherhichaveste.blogspot.com
0 Response to "How To Install Wordpress On Wamp Server In Windows 10"
Post a Comment